Like Lois Pearl

Showing posts with label Crafty. Show all posts

Friday, April 27, 2012

Girls Weekend!

My SIL, Jordan, and I decided that we were long overdue for a girls weekend.  Our idea of a big time?  Lock ourselves in the country, in a house that is 90% empty, and stitch away!

Jordan is just learning to sew.  She decided that an apron would be a great first big project.  After making a run to my parents' farm for dinner and digging through Nana's old aprons, we had a style that was perfect.

A few ripped stitches, and several rounds of rethreading her machine (we all do this) later, she had an original, beautiful, feminine apron!


Her fabric vintage inspired fabric choices were perfect for this style!  Don't you love the button detail at the neck?


She mastered so many techniques in just this one project!  
Ruffles
Top stitching
&
Button holes

How lucky am I that I have a beautiful SIL, who likes me enough to hang out in an empty house in the country sewing away?

Friday, February 10, 2012

Stenciled Burlap Pillows

Sometimes it's just fun to dig through my crafty closet and see what I can create.  It can be a rewarding challenge, especially when it works out!

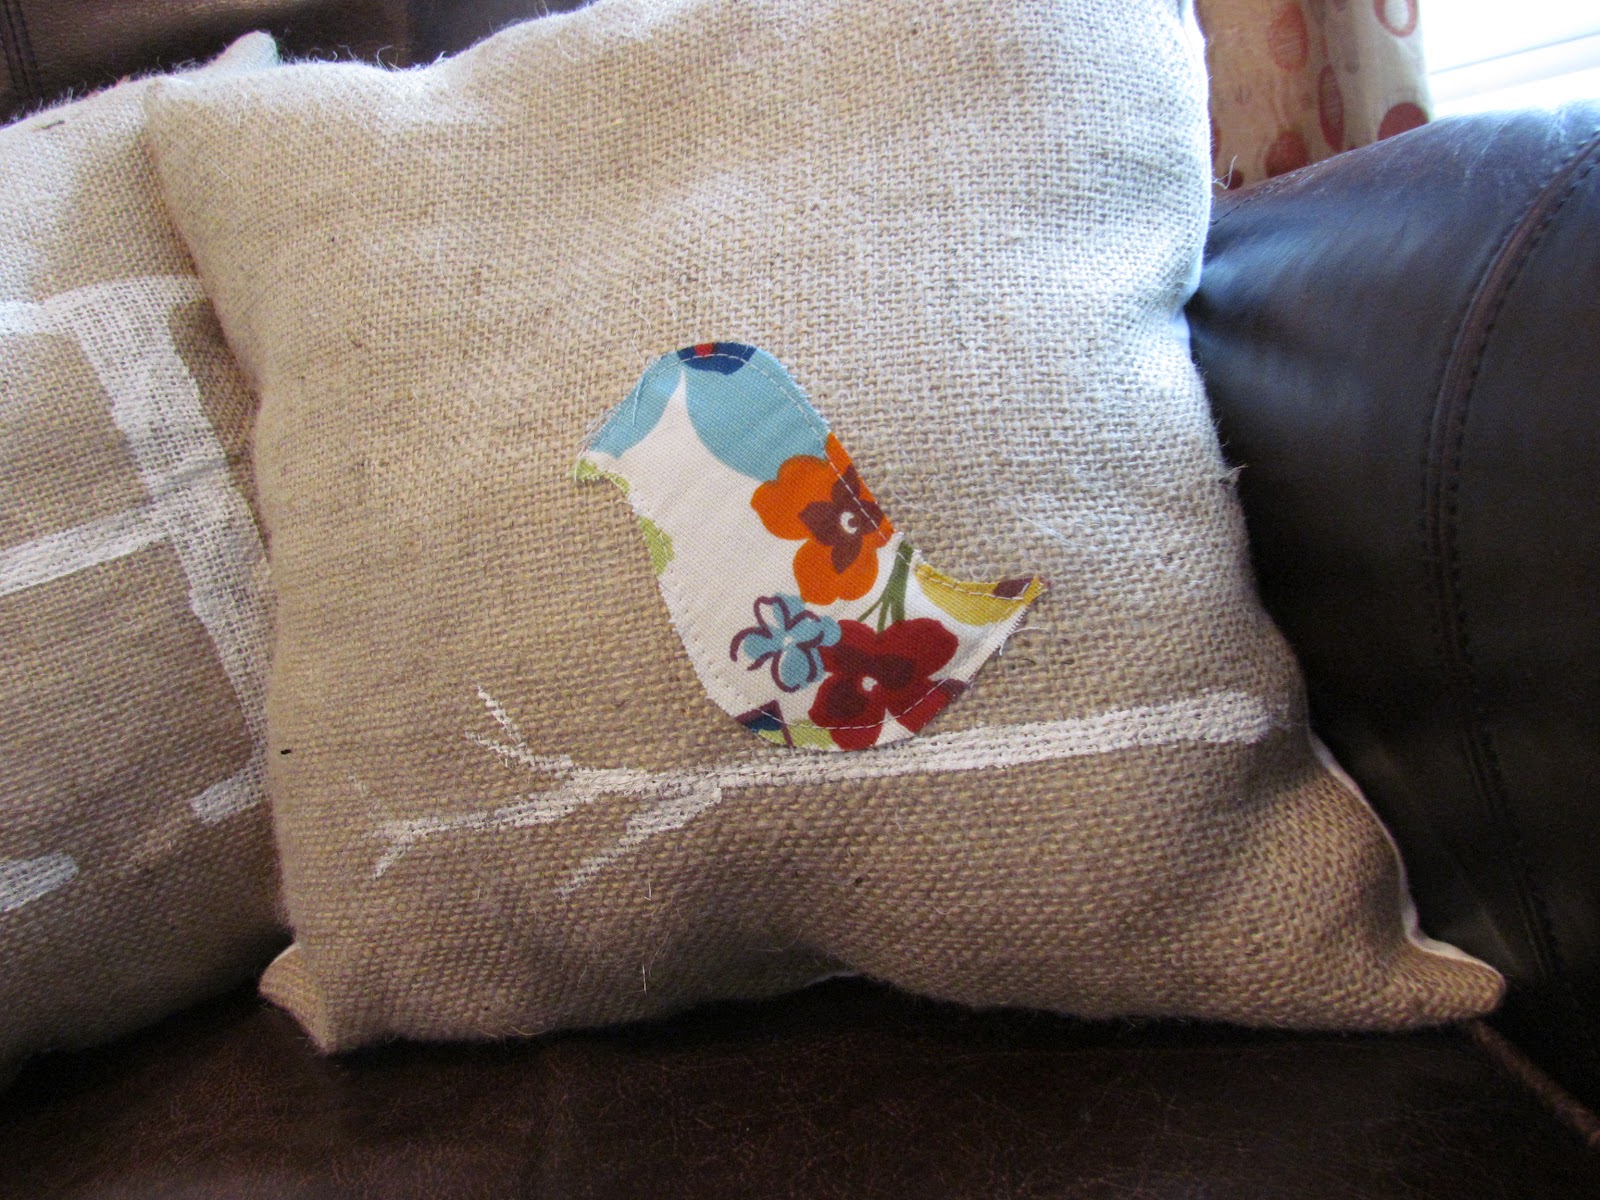
I found some burlap, fabric scraps, acrylic paint, and an old sheet.  Here is a quick glimpse of what I created!


I free-handed the little branch onto the burlap first.  One it had dried, I stitched the little birdie on so that the raw edges are exposed.  I like that it will fray over time.


I printed an "H" out on the computer in the font and size that I desired.  I then cut it out and used it as my stencil.  I love that it's personalized!  Wouldn't these make a great gift?


It's funny how something as simple as a few new pillows can really brighten up a room!

Happy Crafty!

Thursday, February 9, 2012

Upcycled Stripey Dress

The Peanut has hit a huge growth spurt over the past couple of months.  She must have inherited her Gam's height genes!  (my MIL is 6' tall and very willowy, lucky lady!)

As a result, all of her old t-shirts are too short in the torso, but fit through the shoulders.  I decided to try my hand at crafting up a little dress from these old t's.


First, I cut her t-shirts off about 4" from the underarm seam.


Next, I collected several old knit shirts of my own, and cut 12" x 6.5" strips.


I then serged the striped together, creating a seam down the long side.  

I continued this process, until I had sewn 6 strips together to form a skirt.


I then attached the skirt to my top, and had a dress!

I chose to embellish the dress with a little flower created from my knit scraps.

What could be better than a new dress....that is one-of-a-kind, made with love, and free?


Happy Crafty!

Wednesday, February 1, 2012

Valentine Crayons

This is such a fun and simple craft to do with your kiddos! We love crayons around here, and always seem to have an ample supply of broken ones. Creating our own crayon shapes was an easy and inexpensive way to create a homemade Valentine gift for our friends!


First we rounded up all of our broken crayons. The kiddos helped peel the outer "shells" off, and we broke them into small pieces.


My little people then sorted the pieces by color, gave our mold a good shot of non-stick spray and filled it with the colorful bits.


We then popped them in a 275 degree preheated oven and baked them for about 8 minutes, just until the crayons began to melt.  I pulled them out of the oven and swirled them with a toothpick.


I'm impatient, so instead of allowing them to cool on the counter, I then put them in the freezer.  About 20 minutes later we popped the little guys out and had crayon hearts galore!


They will make darling little Valentine gifts for the preschool friends....and the mommies will appreciate that they don't result in a sugar high!

XOXOXO


Monday, January 30, 2012

Bathtub Paint

What is a desperate mom to do when it's nasty outside, and she has two crazy kiddos to entertain? Make homemade bathtub paint of course!

This recipe has only 3 ingredients, and you likely have them on hand.

Homemade Bathtub Paint

1/3 c. Baby Shampoo
1 T. Cornstarch
A few drops food coloring


Mix, put in a small bowl, and let the kiddos go to town painting one another and the tub.


Most of the recipes I found called for dish soap. I didn't like the idea of coating my kids in super sudsy dish soap, so I adapted those recipes to use baby wash instead. It worked great!

Hint: I strip the kiddos down and let them paint before adding water to the tub. This way they are much less likely to slip and fall while painting.


Happy Crafty!

Linking up at:
The Girl Creative
Positively Splendid
Sumo's Sweet Stuff

Monday, January 23, 2012

Window Clings (Kids Craft!)

With all the snow falling outside last week, we were desperate for some crafty projects to keep little hands busy!

I found this great window cling idea just in time.

Supplies:
Wax paper
Puff paint for fabric

First we used a sharpie (well, mommy did) to draw designs onto our wax paper.


Then I let the kiddos go to town with puffy paint.  The Peanut chose sparkly silver, and The Bug's choice was glow-in-the-dark blue.  They promptly ignored most of my drawing guidelines and made lots of great blobs and squiggles instead.


I couldn't resist doing just one shape by myself!


We allowed our little blobs and squiggles to dry overnight, and then put them on our windows the next day.  The glow-in-the-dark paint was such a hit!

This would be a great snow day craft to keep on hand.  It was fairly quick, the kiddos had a great time, cleanup was easy, and the total project cost was less than $5!

Friday, January 20, 2012

Easy Canvas Photos

I friend of mine had introduced me to this tutorial from The Sassy Pepper.  It's been on my crafty "to-do" list ever since!  We have so many blank walls in our house.  Little by little my goal is to fill them up this year, and this was the perfect craft for it!


Here's what you'll need to get started.

8x10 canvas ($4.99)
8x10 photo (photo quality paper!) ($2.00)
Mod Podge (I used glossy)
Black Acrylic Paint ($.99)
Sponge Paint Brush
Black Ribbon ($2.00)

(pretzels in the picture are optional)


1.  Trim the edges of your photo so they lie just inside the edges of the canvas.  You won't want your photo edges hanging over.

2.  Spread a thin layer of Mod Podge over your canvas.  Place your photo on the top taking care to smooth out any air pockets, and allow to dry.


3.  Spread another layer of Mod Podge over your photo.  Don't worry, the Mod Podge will dry clear!


4.  Once the Mod Podge has dried, spread one last coat on top of your photo.

5.  After all of your Mod Podge is dry and glossy, get out your paint and paintbrush.  I chose to paint the sides of my canvas black, but you could also craft them up with scrapbook paper if you prefer.  Using your sponge brush, carefully paint the edges and corners of your canvas black....all the way to the edge of your photo.  Don't worry if you get too much paint on your photo edges, just gently wipe it off with a wet paper towel.


6.  Allow your paint to dry.  Then cut 2 lengths of ribbon (mine were about 18" each).  Tie a bow in the ribbons, and attach them to the back of your canvas using a staple gun.


Now you can enjoy your custom wall art!


My total project cost was just under $15.00 for two canvases!  I have a few more old canvases that I'll be using next time, and I already have all of the other supplies that I need!  This would be a great crafty to do with friends!

Linking Up Here


Friday, January 13, 2012

Craft it Forward!

We had a wonderful holiday season here in our home.  Lots of family time, and lots of giving.

I've decided that I don't see any reason why the giving needs to stop just because December 25th as come and gone.  I even have a little game, so that you all can keep the giving going too!

We'll call it....


Here's how it will work.

The first 3 people to leave a comment on this blog post will receive a one-of-a-kind handcrafted item made by me!  The only requirement, those three people then have to pass on 3 handcrafted items to 3 other lucky people!

Worried about what kinds of "crafts" you might be pass along?  No worries, it could be as simple as a homemade cookie, or a handwritten note!

How fun is this?  We'll be putting smiles on faces one crafty gift at a time!

If you choose to participate, I would love for you to share your Craft it Forward stories with me, so that I can share them on the blog!  Pictures are always terrific too!

Let's keep the giving going!  Remember, I need three great comments to get the ball rolling!

Thursday, January 12, 2012

Quilt Block for a Cause

Valerie, of Pink Please!, is creating a wonderful quilt that will be auctioned off to raise funds for breast cancer research.  She requested that her fellow crafties submit blocks, along with a 4x6 card letting her know who the block was honoring.


The blocks are stunning.  She chose a beautiful pattern with a super easy tutorial, and I was so excited to create my own block for her!


I created my block in honor of two wonderful ladies who both fought breast cancer.  My friend Megan S. Ott, and my grandmother, Francis Mellon Phillips.  Both had such a great appreciation of craftiness, I know they would love this project!

Be sure to keep your eye on the blog this weekend.  I'll be launching a fun GIVEAWAY of sorts, and I'll need your help!

Friday, January 6, 2012

Knit Bracelet

A friend pointed these great bracelets out to me at a recent craft show.  I loved them, and snatched up 3 for myself.  When I got home, I found this quick tutorial by Vanessa Christenson.  They are such a fun way to use up my knit scraps!

Here is the end result.


It took me about 5 minutes to complete the bracelet.  The best part, I didn't need to buy any supplies!  Just a strip of knit, and your fingers, and you're ready to go!

Won't they look great layered up on your wrist this spring?  Such a simple way to spice up a plain t-shirt!

Wednesday, January 4, 2012

A Stretchy Scarf

When my friend Traci sent me a link to this tutorial at Make It and Love It, she had no idea what great timing she had!

I've been staring at a big strip of cream knit fabric (leftover from double ruffle pants) and wondering how to best turn it into a scarf.  This was the perfect inspiration!  My trusty Janome was even set up for the shirring!  In about 10 minutes I had 2 super stylish and soft scarves.  


You just stitch your way around the scarf, using normal thread on the top for the front, and elastic thread in the bobbin for the back side.  It makes beautiful gathers, and is virtually fool proof.


They are fun for winter, but I really think they'll be perfect for dressing up simple t-shirts this summer.  Especially looped infniti style with a fun fabric flower pin!


Me with my super-expressive face.  
Nothing like taking your own picture in the mirror to make you feel like a big nerd!


This would be a great project for someone just experimenting with shirring (ahem....Kimberlee!)


Monday, January 2, 2012

All Rested Up!

Sorry for the long absence.  I hope that you all had a wonderful holiday season.  We had a great holiday spent with friends and family.  Of course, we incorporated a bit of crafty too!  Here's a quick glimpse.

A sweet trio of personalized shirts.  What a fun custom order!


We made homemade ornaments for our Aunties and Uncles.


Daddy and E Lo made a family favorite, homemade snack mix!


I hope that you had a wonderful, family filled, restful, delightful holiday.  We'll be back to our normal schedules tomorrow, and I'll have a wonderful recipe to share!

Happy 2012!


Saturday, December 10, 2011

Last Show of the Season

Indiana folks, come see us today!

We're at the Hoosier Road Elementary Holiday Bazaar from 8am-noon!
(located at Hoosier Road Elementary, Fishers, IN)

Here's a little glimpse of what we'll have on hand!


Lots of dresses, pants and tops!

And of course my little monsters!

Unable to attend?  You can always browse our etsy shop, or email me for a custom order!